
Rubbish chutes (also called debris chutes) can make waste handling faster and cleaner on Sydney building and renovation sites, but they also concentrate risk in one place: an elevated drop path with people, materials, and the public potentially nearby.
This guide is a practical, supervisor-friendly checklist you can use to plan, install, inspect, and operate a rubbish chute system safely. It focuses on the three incident types that keep showing up on real sites:
- Falls from height during installation or use
- Falling objects and uncontrolled drop zones
- Blockages, spills, and “mess events” that trigger rework, complaints, and injuries
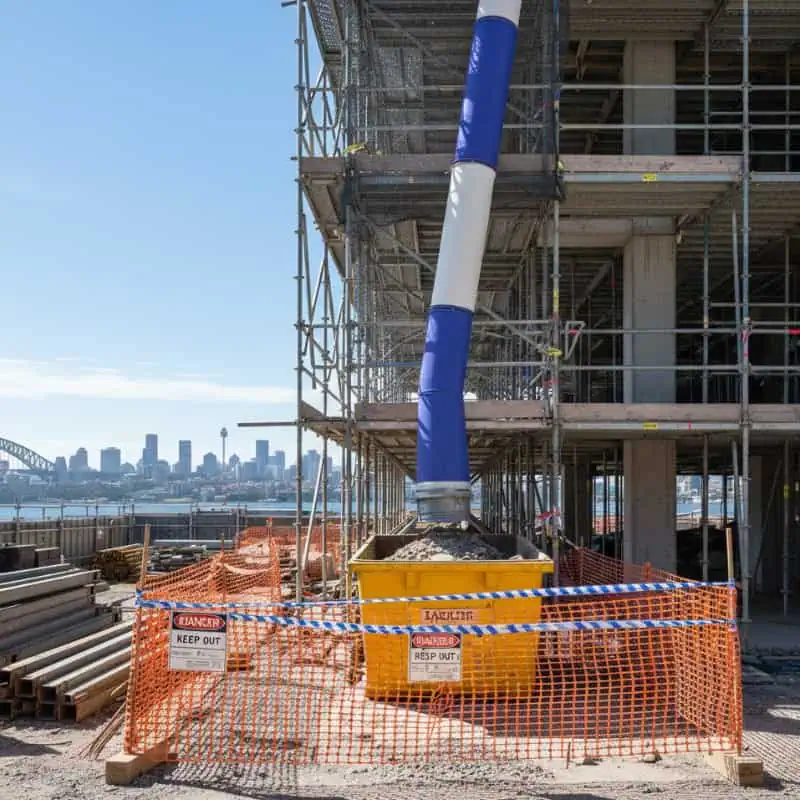
If you’re still deciding what configuration suits your project, it helps to review the common options for rubbish chute systems for building sites so your plan matches the job conditions (height, access, bin placement, and waste type) from day one.
Before you install: the planning checks that prevent most problems
A “good install” starts well before anyone lifts a chute section.
Confirm the work method and responsibilities
Decide who is responsible for each part of the job:
- Who is installing/altering the chute and when
- Who is supervising and signing off on pre-use checks
- Who controls the exclusion zone and site access
- Who is monitoring waste loading and bin changes
- Who shuts the system down (and how) at the end of the shift
If multiple trades will use the chute, make it explicit: one person (or role) owns the system each day.
Choose a safe chute line and a safe drop zone
Aim for a chute run that is:
- As straight as practicable
- Supported at the required intervals (per the system’s instructions)
- Positioned away from high foot traffic, amenities, and “shortcuts”
- Not discharging near overhead services, powerlines, or public boundaries
For the bottom drop zone, choose a location that:
- Allows a bin/skip to sit squarely under the discharge point
- Has enough room for barriers and signage (not just a token cone)
- Keeps the public and non-essential workers away
- Allows safe vehicle access for bin changes without reversing through crowds
Sydney sites often have tight boundaries and shared access. If the chute has to run close to a boundary or over a driveway/footpath area, your public protection controls need to be stronger, not lighter.
Check the waste type you expect to drop off
Most blockages and spills start with “someone sent the wrong thing down the chute”.
Confirm upfront:
- What materials are allowed (plasterboard offcuts, small timber pieces, light demolition waste, etc.)
- What’s not allowed (long lengths, tangled mesh, wet slurry, oversized rigid items, heavy chunks that exceed load guidance)
- Whether you need dust controls (common with internal strip-outs)
- Whether you need noise controls (built-up residential areas)
Build chute hazards into your SWMS / risk controls
You’re managing fall risks, falling objects, and manual handling all at once. For nationally aligned guidance on falling objects risk controls (including exclusion zones and securing loads), refer to Safe Work Australia’s falling objects fact sheet.
Installation day checklist: set-up that prevents falls and failures
This section assumes you’re using a modular chute system attached to a structure/scaffold, discharging into a bin/skip at ground level.
Access and fall prevention during installation
Before you lift the first section:
- Confirm safe access (scaffold, platform, or suitable elevated work method)
- Ensure edge protection is in place where required
- Ensure workers have been briefed on the installation sequence
- Keep non-essential workers out of the installation area
Falls often happen during “just a quick adjustment” moments. Treat alterations as seriously as the first install.
Fixings, connections, and support points
Follow the system’s instructions for:
- Fixings/brackets and their spacing
- Required support points (especially at bends, transitions, and near the top)
- Correct connection method between sections (locks, chains, pins, straps)
- Ensuring sections are seated properly (no half-clipped joins)
Installation basics that reduce movement and cracks:
- Don’t force misaligned sections to “fit”
- Don’t introduce sharp kinks in the run
- Keep the run stable (movement is a warning sign, not “normal”)
- Re-check after any scaffold alteration, height change, or severe weather
Drop zone controls: barriers, signage, and no-go areas
Your drop zone should be a “can’t miss it” set-up, not wishful thinking.
Minimum practical controls:
- Solid barriers where feasible (not just tape in a high-traffic area)\
- Clear signage: “Falling objects risk / No entry”
- A defined path for bin changes that doesn’t cross through the exclusion zone
- A person controls entry when bins are swapped
If you’re near a boundary, add controls such as:
- Overhead protection where appropriate
- Additional monitoring during busy periods (deliveries, peak pedestrian flow)
Bin/skip placement and discharge alignment
To prevent spills and ricochets:
- Centre the bin under the discharge point
- Secure the bin position where possible (so it can’t creep forward/back)
- Consider a cover or lid approach that reduces dust without interfering with discharge
- Keep the area around the bin clear (no loose materials that become trip hazards)
Pre-start daily checks: the “2-minute look” that catches most issues
You don’t need an essay each morning, but you do need consistency.
Structural and connection checks
Each shift (or before first use):
- Check every visible connection point for looseness, missing pins, damaged locks, or cracked sections
- Check the top entry point for damage, instability, or unsafe access
- Check bracket points for movement, deformation, or missing components
- Check the chute run for new bends, kinks, or rubbing points
If the chute has moved, creaks under light load, or shows new cracks, stop and rectify before use.
Exclusion zone and signage checks
- Are barriers still in place and intact?
- Can someone still “walk through it” easily?
- Are the signs visible from the approach direction?
- Has the site layout changed (new walkway, new gate, new delivery path)?
Housekeeping and slip/trip checks
Around the chute entry and base:
- Clear loose rubble that could cause slips/trips
- Keep the entry area tidy (spilled waste at height becomes a fall risk)
- Keep hoses/cables routed away from the entry point
- Ensure lighting is adequate for early starts and internal works
Quick operational check
Before full use:
- Drop a small amount of permitted waste to confirm the flow
- Confirm the bin is aligned and not overfilled
- Confirm the drop zone is clear and controlled
Q&A: What are the “stop work” triggers for a rubbish chute?
Stop using the chute (and escalate) if you see any of the following:
- Visible cracks or damage to chute sections
- Loose fixings, missing pins, or connections not fully seated
- Unexpected movement/sway during light loading
- An exclusion zone that can’t be maintained (crowds, deliveries, public access)
- A developing blockage (waste “hanging up” repeatedly)
- Wind conditions are causing debris drift at the discharge area
Safe loading checklist: preventing spills, blockages, and falling objects
Most chute incidents happen during use, not installation.
Waste preparation rules that keep the chute flowing
Before waste goes in:
- break large items down (don’t “make it fit” by forcing it)
- Avoid long, rigid pieces that can bridge or spear into bends
- Keep waste dry where possible (wet plaster and slurry-like debris are blockage magnets)
- Don’t mix incompatible items (tangled mesh plus timber offcuts plus plastic wrap is a common jam combo)
A simple site rule that works: if it can’t drop freely, it doesn’t go down the chute.
Loading behaviour: small habits that prevent injuries
- Don’t lean over openings
- Don’t throw waste from a distance (increases bounce and misfeeds)
- Don’t overload the entry point (steady feed beats big dumps)
- Keep hands clear of pinch points and edges
- Maintain clear communication if multiple people are feeding the chute
If you’re training new starters, build these habits into the toolbox talk and reinforce them on day one.
Dust, neighbours, and the “Sydney renovation reality”
On internal strip-outs and apartment renovations, dust is often the number-one complaint.
Practical controls:
- Control loading rate to reduce dust “puffs”
- Use compatible containment methods at the entry point (screens/sheeting in internal areas)
- Keep the bin/skip managed so waste doesn’t overflow and spill
- Plan noisy waste drops around reasonable hours and site constraints (especially in dense residential areas)
This is where a clear, repeatable rubbish chute safety set-up procedure helps: the quieter and cleaner your drop zone runs, the fewer interruptions you’ll deal with mid-job.
Q&A: What can’t go down a rubbish chute?
Avoid sending items that are likely to:
- Wedge (long lengths, large rigid panels, tangled materials)
- Shatter dangerously (heavy, brittle chunks that break into sharp projectiles)
- Smear and stick (wet plaster, slurry, adhesive-heavy waste)
- Exceed the system’s capacity guidance
When in doubt, remove it by another method rather than gambling on “it’ll probably go”.
Exclusion zone checklist: protecting workers and the public
Think of the chute like a vertical conveyor of risk. The exclusion zone is what stops that risk landing on someone.
Set the zone width for real behaviour, not ideal behaviour
Consider:
- Bounce-out risk at the bin/skip
- Wind drift (especially on higher runs)
- How people actually move around the site
- Visibility around corners, hoardings, and temporary fences
If you’re in a tight space, you may need to alter the chute location or strengthen controls (solid barriers, spotter during busy times, revised bin change method).
Control the zone during bin changes
Bin swaps are when people are tempted to “just keep using the chute”.
Rules that prevent incidents:
- Stop chute use during bin change
- Clear and reconfirm the exclusion zone
- Confirm the new bin is aligned before restarting
- Restart with a small test drop
Blockage response checklist: what to do when the chute jams
Blockages are common, and the response is where people get hurt.
Immediate actions
- Stop loading immediately
- Keep the exclusion zone in place (a jam can release suddenly)
- Tell nearby workers the chute is out of service
- Assess from a safe position — don’t reach into openings or climb onto unstable points
Safe clearance approach
Your approach depends on the system and access method, but the principles are consistent:
- Clear from the safest access point (often from above, not from the bottom)
- Avoid placing people under the chute line
- Use the right tools and method (not improvised poking from awkward positions)
- If the blockage is significant, treat it as a planned task with supervision
Preventing repeat jams
After clearing:
- Identify the cause (wrong material, overloading, kink, damaged section)
- Correct the cause (change waste prep rules, adjust the run, replace damaged parts)
- Brief the team before recommencing
If a chute blocks repeatedly, it’s not “bad luck” — it’s a system problem.
Change management checklist: when conditions shift, your controls must shift too
Rubbish chute safety degrades when the site changes around it.
Re-check (and document, if required) when:
- scaffold configuration changes
- Chute height increases or decreases
- Weather shifts (strong winds, heavy rain)
- Site access routes change
- Other plant starts operating nearby (cranes, hoists, EWP traffic)
- The waste type changes (demolition phase begins, heavier rubble, etc.)
A useful habit: treat every change as a mini re-handover.
A practical checklist you can copy into a toolbox talk
Use this as a quick briefing structure.
Install and set up
- Confirm safe access and fall prevention for installers
- Install per system instructions: fixings, spacing, connections, support points
- Keep the run straight, stable, and free from sharp bends
- Establish a clear exclusion zone with barriers and signage
- Align bin/skip and keep the base area clear
Daily pre-start
- Inspect connections, fixings, brackets, and visible sections for damage/movement
- Confirm the exclusion zone is intact and still practical for current site flows
- Tidy entry and base areas (slip/trip prevention)
- Test with a small drop before full use
During use
- Only permitted waste types; break down oversized items
- Steady loading; no throwing; no leaning over openings
- Keep the drop zone controlled at all times
- Stop work for movement, cracks, repeated hang-ups, or changing conditions
Blockage response
- Stop loading; keep the exclusion zone active
- Clear using safe access and a planned method
- Address the root cause before restarting
FAQ
How often should a rubbish chute be inspected?
At minimum, do a pre-start visual check each day before first use, and re-check after any change (scaffold alterations, height changes, severe weather, repeated blockages, or damage).
What’s the most common cause of blockages?
Wrong waste type and overloading. Long rigid pieces, tangled materials, wet plaster-like debris, and “big dumps” are frequent culprits.
How do you reduce dust when using a chute on renovations?
Control loading rate, keep waste suitable (avoid fine powder dumps), use compatible containment methods at the entry point, and keep the bin managed so it doesn’t overflow and spill.
Can you keep using the chute while swapping bins?
It’s safer to stop chute use, keep the exclusion zone active, align the new bin, then restart with a small test drop.
If you’re reviewing configurations or checking you’ve got the right components for the waste you’re generating, it can help to compare options designed specifically as rubbish chutes for construction waste so the system you install matches your materials, access constraints, and site layout.