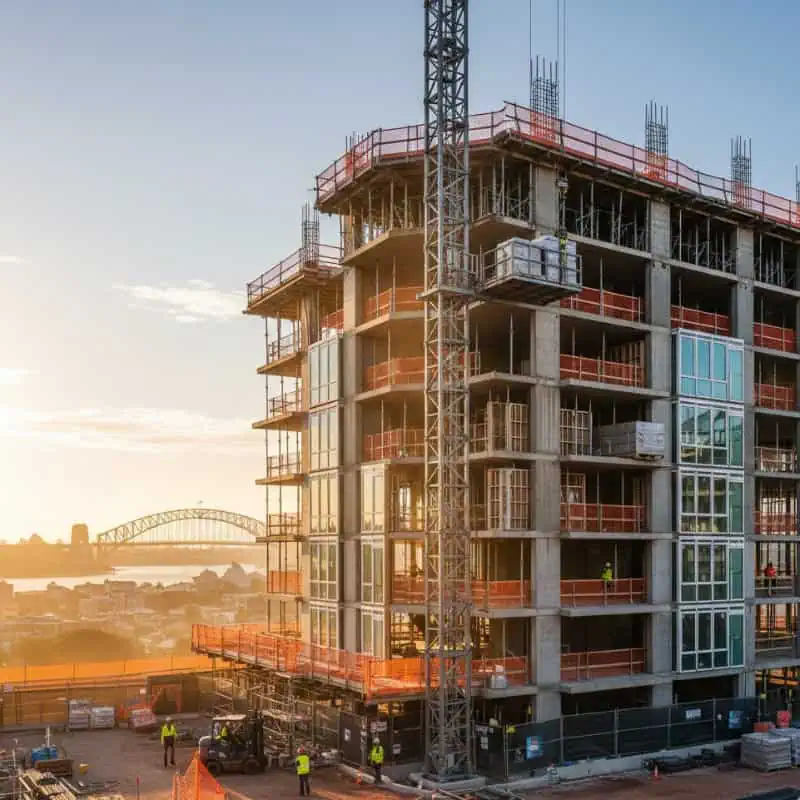
If you’ve ever watched a Sydney job stall because materials can’t get to the right level fast enough, you already know the real cost isn’t the hoist hire fee—it’s the downtime, double-handling, and manual lifting that creeps into every trade’s program.
The good news: choosing the right materials hoist doesn’t need to be complicated. You just need to match four things to your site:
- Capacity (what you’re lifting)
- Height (where it needs to go)
- Access (where the hoist can physically live and how it’s loaded)
- Power (what you can realistically supply on-site)
This guide walks you through a practical selection process designed for Sydney conditions—tight sites, lane access, staged deliveries, and jobs that can’t afford another “we’ll make it work” workaround.
What Is a Materials Hoist and When Should You Hire One?
A materials hoist is a site lifting solution designed to move building materials vertically—faster and safer than carrying items up stairs or using ladders, and usually with less congestion than running materials through internal areas.
You’ll typically consider a materials hoist when:
- You’re consistently moving bulk materials to upper levels (bricks/blocks, sheeting, framing packs, tiles, bags, tools)
- Stairs are not installed yet, blocked, or unsafe for repetitive transport
- You want to reduce manual handling risk and speed up vertical logistics
- You’re trying to keep internal areas cleaner and less congested (especially on renovations)
If your work requires lifting people as well as materials, you may be looking at a different class of hoist (often called a personnel and materials hoist). For this article, we’re staying focused on materials-only selection for typical Sydney construction and renovation workflows.
The Sydney Job-Site Reality Check (Why Hoist Selection Gets Tricky Here)
Sydney sites are rarely “open paddock, easy access, unlimited power”. Common constraints include:
- Narrow driveways and laneways (Inner West terraces, older suburbs, rear access)
- Staged access times and neighbour constraints (noise, deliveries, traffic)
- Limited laydown areas (materials arrive, then must move immediately)
- Variable power availability (temporary boards, distance from supply, competing trades)
- Overhead services and clearance risks (street trees, lines, tight setbacks)
The hoist that works perfectly on a wide suburban build can be a headache on a tight infill job. Selection isn’t just about “how heavy” and “how high”—it’s also about “how we install, load, and run it every day without chaos”.
Step 1 — Choose the Right Capacity (kg) Without Guessing
Capacity is where most hoist selection goes wrong—usually because someone estimates based on “one load” rather than real site use.
How to size capacity the practical way
Instead of asking “What’s the heaviest thing we might lift once?”, ask:
- What are we lifting most often?
- How many items per load will we realistically stack?
- How many loads per hour do we want (to keep trades moving)?
- Will loads get heavier as the build progresses (tiles, waterproofing, render, tools)?
A simple rule of thumb:
• If the hoist is constantly at its limit, productivity drops fast (more trips, more waiting, more risk of overload attempts).
Common load examples (everyday Sydney scenarios)
These aren’t exact weights (brands and materials vary), but they help you think in “real loads”:
- Bricks/blocks: heavy quickly—one extra bundle can push a load over capacity
- Gyprock/plasterboard: bulky and awkward—platform size matters as much as kg
- Tile boxes and adhesive: deceptively heavy and repetitive
- Roofing materials: can be bulky; lifting height and landing access matter
- Tools + consumables: smaller items add up fast when you’re trying to minimise trips
If you want a quick starting point for comparing hire options, begin with materials hoist hire in Sydney and make capacity your first filter.
Capacity checklist
Before you pick a hoist capacity, confirm:
- Maximum planned load weight (not a guess—write it down)
- Typical load weight (what you’ll lift 80% of the time)
- Whether loads are dense (bricks, tile adhesive) or bulky (sheeting)
- Whether you’ll load by hand, pallet, barrow, or mechanical aid
- Who controls loading on site (so it stays consistent)
Step 2 — Match Lift Height to the Real Landing Point (Not Just “Number of Levels”)
“Two-storey” can mean a lot of things in Sydney. Ceiling heights, split-levels, sloping blocks, and raised slabs all affect where materials need to land.
Height questions that prevent wrong hires
Ask these early:
- What’s the highest level we need to service (frame stage, roofing stage, fitout)?
- Where will the landing be—balcony, scaffold deck, slab edge, or through an opening?
- Are we lifting above a roof line or parapet?
- Do we need multiple landing points across stages?
Landing access matters as much as height
It’s not enough to reach the level—you need to unload safely and efficiently.
Look for practical considerations like:
- Clear landing space (no bottlenecks)
- Safe gates/controls at landings
- A repeatable unloading method (not “swing it and hope”)
- Minimised manual carrying distance after unloading
When the landing is awkward, even a powerful hoist can become a time-waster.
Step 3 — Solve Access First (Because Access Determines Everything)
Access is the hidden “deal breaker” for many Sydney builds. Even if the hoist specs look perfect, you still need to:
- Deliver it
- Install it
- Load it daily
- Keep it safe and clear of site traffic
The four access questions to answer on every site
- Where can the hoist physically sit?
• Ground conditions, clearance, setbacks, slab edges, and safe exclusion zones - How will it be loaded at ground level?
• Can barrows access it? Can pallets be staged near it? Is there room to turn? - How will materials move after landing?
• Will they roll straight onto a deck? Do they need to be carried through rooms? - What can’t be blocked?
• Driveways, egress routes, neighbour access, footpaths, loading zones
Tight-access Sydney sites (what usually works better)
On constrained sites (terraces, duplexes, laneways), selection often comes down to:
- Smaller footprint options that don’t dominate the only access path
- Smarter loading methods that don’t rely on a big laydown area
- Clear daily routines so materials don’t pile up in the wrong place
If you’re trying to plan this properly, the fastest way is to work through a structured material hoist selection checklist before you lock in a hire booking.
Step 4 — Confirm Power Requirements (and What to Do If Power Is Limited)
Power is where “it’ll be fine” turns into delays.
Sydney temporary site power can be unpredictable—especially early in a build, during renovations, or where multiple trades are running high-draw equipment.
Power questions that stop surprise issues
- What power is available right now (not later)?
- How far is the supply from the hoist location?
- Are other high-draw items running at the same time?
- Do we need dedicated circuits or protection?
- What’s our plan for wet weather protection and safe cable routing?
Practical power planning tips
- Plan cable routes so they don’t become trip hazards or get crushed by site traffic
- Avoid “temporary temporary” setups that change daily—consistency reduces faults and downtime
- If the hoist is a daily-critical asset, treat power like a critical path item (because it is)
If you’re unsure, ask your hire provider early what the hoist needs and what site setup they recommend. That one call can save days of reshuffling.
Materials Hoist vs Ladder Lift vs Conveyor (What’s Best for Sydney Sites?)
Choosing the right lifting method is often about flow, not just height.
When a materials hoist is the better pick
A materials hoist is usually best when:
- You need repeatable vertical lifting across multiple trades
- Loads are heavy or frequent
- You want predictable cycle times and fewer manual carries
- You’re servicing multiple levels or working for multiple weeks
When other options can make sense
A ladder lift, or conveyor, may suit when:
- The job is short-duration with limited vertical transport needs
- Materials are lighter and can be staged easily
- The site layout supports a continuous feed rather than lift cycles
On many Sydney jobs, the most efficient approach is a combination (for example: conveyor for certain materials and a hoist for heavier/bulk items). The key is matching the method to how materials actually move on your site.
The “Don’t Get Burnt” Checklist Before You Book Hoist Hire
Use this as a practical pre-hire checklist for Sydney projects:
- Confirm maximum load weight and typical load size
- Confirm the highest landing point (in metres) and where the landing will occur
- Identify the hoist location (with clear access for installation and daily use)
- Confirm ground conditions and stability requirements
- Check overhead clearance risks (trees, lines, structures)
- Confirm power availability and safe cable routing plan
- Confirm who is responsible for daily checks and safe loading practices
- Plan a staging area for loading and unloading so materials don’t block access routes
- Align hoist schedule with deliveries (so the hoist is working, not waiting)
If you want a simple way to shortlist models, review materials hoist capacity options and then narrow down based on your site constraints.
Safety and Compliance on NSW Sites (High-Level, Practical)
On Sydney sites, safety is part of selection—not an afterthought. Safe use means:
- The hoist is suitable for the task and installed correctly
- Loads are within rated limits and secured appropriately
- Exclusion zones, gates, and controls are used correctly
- Daily checks are done consistently (not “when we remember”)
- Only competent people operate and supervise hoisting activities
For NSW-specific guidance and definitions around hoists, refer to SafeWork NSW guidance on hoists.
Quick Answers Sydney Builders Ask Most
What size materials hoist do I need for a Sydney build?
Choose based on your typical daily loads, not one-off maximums. Work out what you’ll lift most often (bricks/blocks, sheeting, tiles, bags) and pick a capacity that avoids constant near-limit loading. Then confirm your highest landing point and whether the hoist fits your access constraints.
How high can a materials hoist lift?
It depends on the hoist model and configuration. The correct approach is to measure the highest required landing point (not just “two-storey”) and confirm the hoist can service that height safely with your planned landings.
What power supply does a materials hoist need?
Power requirements vary by model. Confirm what’s available on site now (early build conditions can differ from later stages), plan safe cable routing, and avoid sharing circuits with other high-draw equipment where possible.
Common Materials Hoist Selection Mistakes (and How to Avoid Them)
Mistake 1 — Choosing the smallest hoist to save money
If it creates extra trips and waiting, it costs more in labour than it saves in hire.
Better approach:
• Choose capacity based on workflow, then optimise hire period and utilisation.
Mistake 2 — Not planning the loading and landing flow
A hoist that lands perfectly but unloads into a bottleneck becomes a daily frustration.
Better approach:
• Plan where materials go immediately after landing and keep that area clear.
Mistake 3 — Power “assumptions”
Power issues are one of the easiest ways to lose a day.
Better approach:
• Confirm supply early and treat power setup like a critical path item.
Mistake 4 — Ignoring access constraints until delivery day
Sydney sites punish last-minute access planning.
Better approach:
• Confirm delivery path, installation area, and daily loading routine upfront.
Sydney-Focused Wrap-Up: How to Pick the Right Hoist Fast
If you only remember one thing, make it this: the “right” materials hoist is the one that fits your site and keeps materials moving predictably every day.
Use this simple decision flow:
- Start with capacity based on typical loads
- Confirm height based on real landing points
- Lock in access (delivery, install, load, unload)
- Confirm power early and plan it properly
- Choose a supplier who can advise based on the Sydney site realities