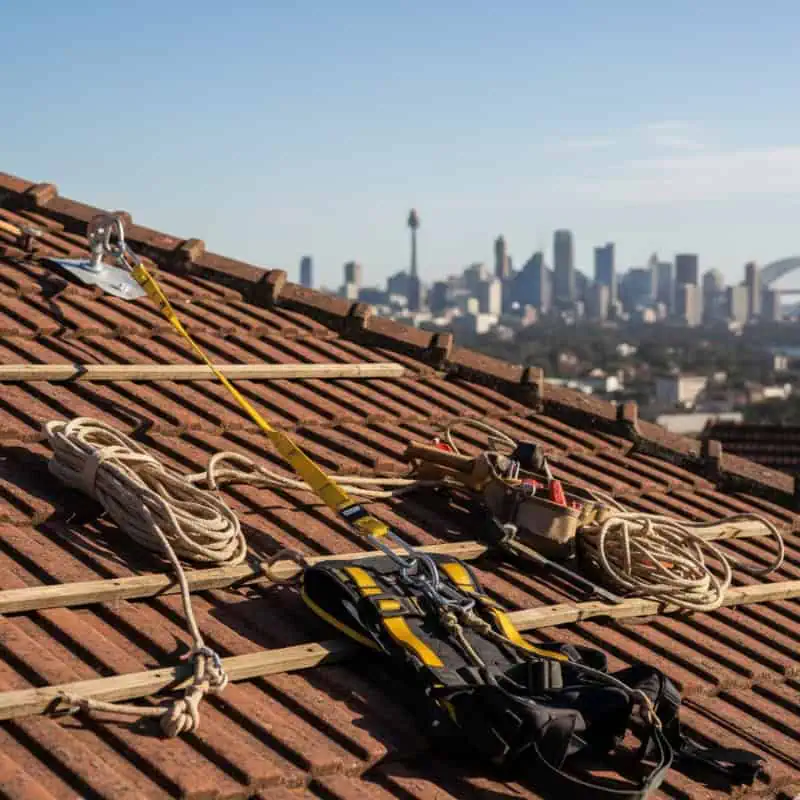
Working on a roof in Sydney can feel deceptively straightforward until you’re actually up there: pitched surfaces, changing weather, brittle tiles, metal sheets with low grip, skylights, edges, and multiple trip hazards. That’s why a “roof harness kit” isn’t really one item. It’s a system made up of parts that must work together, match the job, and suit the roof you’re on.
This guide breaks down what’s typically included in a roof harness kit, what each component actually does, and how to choose a setup that makes sense for real roof tasks in NSW.
First up: a roof harness kit is a system, not a single product
When people say “roof harness kit”, they often mean “the thing that stops me from falling”. In practice, the fall protection system usually involves:
- Something you wear (the harness)
- Something that connects you to the system (lanyard, lifeline, or self-retracting device)
- Something the system is attached to (anchorage/anchor point)
- A plan for how the work will be done (including rescue readiness)
If any one of these is mismatched, you can end up with gear that’s uncomfortable, restricts the work, or in the worst case doesn’t perform as intended.
What’s typically included in a roof harness kit?
Kits vary, but most roof harness kits are built from a “core” plus “task-specific” add-ons. Below is what you’ll commonly see.
Full body harness (the wearable foundation)
A full body harness is designed to distribute arrest forces across stronger parts of the body (thighs, pelvis, shoulders) rather than concentrating load on the waist.
Look for:
- A clearly identified dorsal (rear) attachment point (often a D-ring) for fall arrest
- Comfortable padding where it matters (shoulders/legs) if the kit will be worn for hours
- Easy adjustment and secure buckles
- Correct sizing range for the wearer (and enough adjustment for winter layers)
Practical tip for Sydney roofs: If you’re moving between roof and ladder access repeatedly, comfort and fast adjustment matter more than most people expect. A harness that’s “technically fine” but miserable to wear often gets worn incorrectly.
Connecting device (lanyard, lifeline, or SRL)
This is what links the harness to the anchor point or lifeline system. The right choice depends on how far you need to move, whether you’ll be near an edge, and how much fall clearance you actually have.
Common options include:
- Shock-absorbing lanyard (often the simplest “connector”)
- Rope lifeline with rope grab (allows travel along a line, used in some setups)
- Self-retracting lifeline (SRL), which pays out and retracts as you move and locks quickly in a fall
Shock-absorbing lanyard (energy absorber)
A shock-absorbing lanyard includes an energy absorber (often a tear webbing pack). Its job is to reduce peak forces by extending during a fall.
Best for:
• Short-duration tasks where travel distance is limited
• Situations where you can keep the anchor above you and avoid sharp edges
Watch-outs:
• A standard lanyard can add a lot to fall clearance requirements
• If you’re working close to an edge, you must think about swing fall (more on that below)
Self-retracting lifeline (SRL)
An SRL is like a seatbelt mechanism: it extends as you move and locks quickly during a fall. Many people find SRLs reduce “slack” compared with a longer lanyard.
Best for:
• Tasks where you’re moving frequently
• Situations where you want to minimise free-fall distance
• Some edge-adjacent work (but you still need to choose the right SRL type and consider leading-edge risks)
Watch-outs:
• SRLs are not all the same. Some are designed for overhead use; others are rated for more demanding applications. Always match the device to the use-case and manufacturer instructions.
Anchors and anchorage (what the system is attached to)
This is the part most often misunderstood. You don’t just need “an anchor”. You need a suitable anchorage point appropriate for the roof structure and the work method.
In NSW, it’s worth reading SafeWork NSW guidance on fall arrest anchors to understand what “good” looks like and why anchor selection matters. Here’s an authoritative reference you can bookmark: SafeWork NSW fall arrest anchors.
Common anchorage solutions you’ll hear about include:
- Temporary roof anchors (installed for the task and removed)
- Permanent anchors (installed and left in place, often for ongoing access)
- Static line/lifeline systems (more common for repeated access work)
Your choice depends on the roof type, access, and whether the work is one-off or recurring.
Connectors (karabiners/snap hooks)
Connectors look simple, but compatibility and correct use matter.
Good practice considerations:
- Use connectors that suit the attachment points they’re clipped to (avoid forced fit)
- Ensure gates close and lock properly
- Avoid cross-loading (loading across the wrong axis)
- Keep connectors away from edges that could damage them or the line
Optional but important: trauma relief/suspension straps
If a fall is arrested and a person is left suspended, discomfort and circulation issues can develop quickly. Many harnesses support the use of trauma relief straps (or built-in features) to help maintain circulation while rescue is arranged.
A kit that includes (or is compatible with) suspension relief can be a smart inclusion, especially for remote or low-supervision worksites.
Optional but essential in reality: a rescue plan
“Fall arrest” prevents ground impact, but it does not finish the job. You need a plan for what happens next, even if it’s a basic plan tailored to the site and task.
At minimum, consider:
- Who calls for help, and how
- How the suspended person will be reached
- What equipment is available on-site (or close by) to assist in the rescue
- How to keep the person calm and supported until help arrives
Choosing the right kit: start with the job, not the product list
Instead of choosing a kit because it has the most items, choose it because it fits the scenario you’ll actually face on a Sydney roof.
Step 1: What type of roof and task are you doing?
Ask:
- Is the roof pitched, flat, tiled, metal, or mixed?
- Are you doing a quick inspection, maintenance, cleaning, or a longer job?
- Will you be working close to edges, valleys, or brittle skylights?
- Do you need to move across a wide area or stay in a small zone?
A kit for a short inspection is not necessarily the best kit for extended work across multiple roof faces.
Step 2: Restraint vs fall arrest (what outcome are you aiming for?)
Where possible, the safest approach is to prevent reaching a fall edge (restraint). Fall arrest is used when you can’t eliminate the risk and need a system designed to arrest a fall.
In plain terms:
- Restraint: stops you from getting to the edge in the first place
- Fall arrest: catches you after you’ve fallen
This distinction matters because it influences lanyard length, anchor placement, and whether the work method is realistic.
If you’re comparing different configurations, it helps to look at roofing harness kit options through the lens of “how does this setup change what I can safely do on this roof?”
Step 3: Check fall clearance (the part people skip)
Fall clearance is the space needed below you so that if a fall happens, you don’t hit anything before the system arrests the fall.
Your total clearance requirement typically includes:
- Free fall distance (how far you fall before the system starts arresting)
- Energy absorber extension (if used)
- Device/harness stretch and body movement
- A safety margin
If you’re on a lower roof line, above a balcony, above a driveway with steps, or working near internal voids, clearance can be tighter than you think.
Quick clearance reality-check
Before you assume “it’s fine”, ask:
- Where would I go if I slipped right now?
- Is there any lower roof, awning, fence, aircon unit, or structure I could hit?
- Is my anchor position reducing free fall, or increasing it?
- Am I creating slack in the system by how I’m moving?
If you can’t confidently answer these, that’s a sign you need to re-check the setup.
Step 4: Think about swing fall (sideways movement)
Swing fall happens when your anchor is off to the side. If you fall, you don’t drop straight down — you swing like a pendulum, potentially into an edge or obstacle.
Swing fall risk increases when:
- The anchor is not above (or near) your work position
- You are working laterally across the roof
- There are edges, corners, or penetrations in the swing path
A “great” kit can still be the wrong solution if the anchor is in the wrong place for the way you’re moving.
Step 5: Choose the connector type by movement and edge exposure
Here’s a practical way to decide:
- Limited movement, anchor stays above you: a shock-absorbing lanyard may suit
- Frequent movement, want less slack: SRL may suit
- Need to cover distance across a roof: a lifeline approach might be more appropriate (depending on roof and anchor options)
When in doubt, focus on choosing a roofing harness kit that supports your work method rather than forcing you to work around the gear.
What a “good” kit feels like in real use
A kit that suits the job usually has these traits:
- Harness fits snugly without restricting breathing or leg movement
- You can connect easily without awkward stretching or twisting
- You can move where you need to, without excessive slack
- Anchor location supports the work area and reduces swing fall
- You’ve checked clearance and understand the fall path
- You know what happens if someone is suspended (rescue readiness)
If the gear encourages shortcuts, it’s a sign the system doesn’t match the task.
Common mistakes when selecting roof fall-protection gear
Buying (or grabbing) “one-size-fits-all” for a specific roof
Sydney roofs vary wildly: older tiled homes, steep pitches, metal decks, terraces, and multi-level builds. A single generic setup can be poorly matched to many common situations.
Choosing lanyard length based on convenience, not restraint
Longer isn’t automatically better. Too much length can create slack, increase free fall distance, and increase swing fall risk.
Assuming any roof point is a suitable anchor
Anchorage needs to be appropriate for the structure and the intended load direction. If you’re not sure, treat it as a red flag and verify the method with competent guidance.
Ignoring rescue readiness
A fall arrest system that works perfectly still leaves one big question: how do you get the person down safely and quickly?
Q&A: Roof harness kits
Can I just buy a harness and call it a “kit”?
A harness alone is not a full kit. You still need a compatible connector (lanyard/lifeline/SRL) and a suitable anchorage solution. Without those, you don’t have a functioning fall protection system.
What’s the difference between a lanyard and an SRL?
A lanyard is a fixed-length connector (often with an energy absorber). An SRL extends and retracts as you move and locks rapidly in a fall, often reducing slack. Which one suits depends on movement, clearance, and edge exposure.
Do I always need an energy absorber?
If your setup involves fall arrest, energy absorption is commonly used to reduce peak forces. The correct approach depends on the overall system design and the device/hardware specifications. Match components to manufacturer instructions and relevant guidance.
Is the anchor the most important part?
It’s one of the most important, because everything depends on the anchorage and how it’s installed/used. But it’s still part of a system: harness fit, connector choice, and work method matter too.
A simple “choose your kit” checklist for Sydney roof work
Use this as a quick sanity-check before you commit to a setup:
- Identify the work area and how far you need to move
- Decide whether the aim is restraint (preferred) or fall arrest
- Confirm a suitable anchorage method for the roof structure
- Choose a connector type that matches your movement and edge exposure
- Check fall clearance and the likely fall path
- Reduce swing fall risk with anchor placement and work positioning
- Inspect gear condition (webbing, stitching, hardware, labels/tags)
- Confirm a basic rescue plan and communication method
If you want to compare what’s commonly bundled, this overview of hiring a high-quality roofing harness kit can help you sanity-check inclusions against your task.
What to inspect before each use (quick practical run-through)
Even brand-new gear should be checked before use. For roof harness kits, focus on:
- Harness webbing: cuts, fraying, chemical damage, heat glazing
- Stitching: pulled, broken, or abraded threads
- Buckles and adjusters: deformation, cracks, smooth operation
- D-rings and attachment points: distortion, sharp edges, corrosion
- Connectors: gate closes fully, locking function works
- Lanyard/SRL: visible damage, smooth extension/retraction (for SRL), energy absorber pack intact
- Labels/tags: readable identification and inspection history (where applicable)
If anything looks questionable, treat it as out of service until it can be properly assessed.
FAQ
What’s included in a typical roof harness kit?
Most kits include a full body harness and a connecting device (often a shock-absorbing lanyard), plus connectors. Some kits also include an anchorage solution (temporary anchor or lifeline setup), depending on the intended use.
How do I choose the right roof harness kit for my job?
Start with the roof type and task, then decide whether you’re aiming for restraint or fall arrest. From there, choose an anchorage method that suits the structure, select a connector that matches your movement, and confirm fall clearance and swing fall risks.
How much fall clearance do I need?
It depends on the system (lanyard vs SRL), anchor position, and the energy absorption/extension involved. Always consider free-fall distance, absorber extension, equipment stretch, and a safety margin.
Can I use roof harness gear near an edge?
You can, but edge work increases the importance of anchor placement, swing fall risk management, and connector choice. You also need to consider sharp-edge exposure and whether the device is suitable for that environment.
What’s the biggest mistake people make with roof harness kits?
Treating the harness as the whole solution. The most common real-world issues come from mismatched components, poor anchor choices, and not checking clearance and swing fall risks.